Silent Reading vs. Independent Reading: What’s the Difference? (plus digital tools to assess IR)

During a past professional development workshop, the consultant informed us at one point to end independent reading in our classrooms. “It doesn’t work.” (discrete sideway glances at each other) “Really. Have students read with a partner or facilitate choral reading. Students reading by themselves does not increase reading achievement.”

I think I know what the consultant was trying to convey: having students select books and then read silently without any guidance from the teacher is not an effective practice. Some students will utilize this time effectively, but in my experience as a classroom teacher and principal, it is the students that need our guidance the least that do well with silent reading. For students who have not developed a reading habit, or lack the skills to effectively engage in reading independently for an extended period of time, this may be a waste of time.

The problem with stating that students should not be reading independently in school is people confuse silent reading with independent reading (IR). I could see some principals globbing onto this misconception as fodder for restricting teachers from using IR and keep them following the canned program religiously. The fact is, these two practices are very different. In their excellent resource No More Independent Reading Without Support (Heinemann, 2013), Debbie Miller and Barbara Moss provide a helpful comparison:

Silent Reading

  • Lack of a clear focus – kids grab a book and read (pg. 2)
  • Teachers read silently along with the students (pg. 3)
  • No accountability regarding what students read (pg. 8)

Independent Reading (pg. 16)

  • Classroom time to read
  • Students choose what to read
  • Explicit instruction about what, why, and how readers read
  • Reading a large number of books and variety of texts through the year
  • Access to texts
  • Teacher monitoring, assessing, and support during IR
  • Students talk about what they read

You could really make the case that independent reading is not independent at all: it is silent reading with scaffolds, and independence is the goal. The rest of the book goes into all of the research that supports independent reading, along with ideas and examples for implementing it in classrooms. The authors also cite the Common Core Anchor Standard that addresses independent reading:

CCSS.ELA-LITERACY.CCRA.R.10
Read and comprehend complex literary and informational texts independently and proficiently.
Maybe this information will be helpful, in case you ever have a principal or consultant question your practice. 🙂

Assessing Independent Reading

The challenge then is: how do I assess independent reading? Many teachers use a paper-based conferring notebook. If that works for them, that’s great. My opinion is, this is an opportunity to leverage technology to effectively identify trends and patterns in students’ independent reading habits and skills, which can inform future instruction. Next is a list of tools that I have observed teachers using for assessing independent reading.

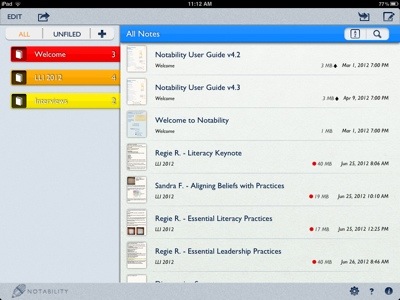
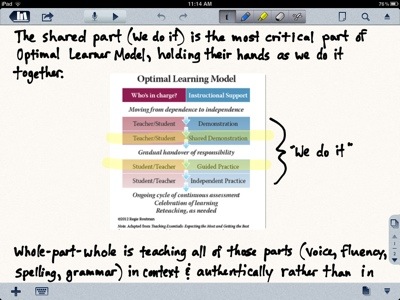
This is an iPad application that allows the user to draw, type, and add images to a single document. The teacher can use a stylus (I recommend the Apple Pencil) to handwrite their notes. Each student can be assigned their own folder within Notability. In addition, a teacher can record audio and add it to a note, such as a student reading aloud a page from their book. This information can be backed up to Google Drive, Evernote, and other cloud storage options.

In my last school, one of the teachers swore by this tool. “If you don’t pay for it,” she stated one day, “I’ll pay for it out of my own pocket.” Enough said! Teachers who use the Daily 5 workshop approach would find CC Pensieve familiar. It uses the same tenets of reading and writing to document student conferences and set literacy goals. Students can also be grouped in the software based on specific strategies and needs.

Teachers can set up a digital form to capture any type of information. The information goes to a spreadsheet. This allows the teacher to sort columns in order to drive instruction regarding students’ reading habits and skills. Also, the quantitative results are automatically graphed to look for classroom trends and patterns. We set up a Google Form in one grade level in our school:

I’ve written a lot about using Evernote as a teaching tool in the past. It is probably the tool I would use to document classroom formative assessment. Each note can house images, text, audio, and links, similar to Notability. These notes can be shared out as a URL with parents via email so they can see how their child is progressing as a reader. Check out this article I wrote for Middleweb on how a speech teacher used Evernote.

The previous digital tools for assessing independent reading are largely teacher-directed. The next three are more student-led. One of my favorite educational technologies is Kidblog. Classrooms can connect with other classrooms to comment on each other’s posts. Teachers can have students post book reviews, book trailers, and creative multimedia projects from other applications.

Whereas Kidblog is pretty wide open in how it can be used, Biblionasium is a more focused tool. It can serve as an online book club for students. Students can make to-read lists, write reviews and rate books, and recommend titles to friends. Like Kidblog, Biblionaisum is a smart way to connect reading with writing in an authentic way.

This social media site is for book lovers. Although 13 is the minimum age to join, parents need to provide consent if a child is under 18. Besides rating and reviewing books, Goodreads allows readers to create book groups with discussion boards around specific topics – an option for teachers to promote discussion and digital citizenship. Students can also post their original creative writing on Goodreads by genre. Check out this post I wrote about how to get students started.

What is your current understanding of independent reading? What tools do you find effective in assessing students during this time? Please share in the comments.

Maximize Learning, Not Technology

One constant that teachers have in schools today is time. We cannot control whether our students had a good night’s sleep, or if they have the right amount of support at home, or if they are able to have quality time with family on a regular basis. We get around 180 days a year and approximately 6.5 hours each day with them. This estimate doesn’t account for standardized testing, fire drills, and all of the other outside factors that as a principal I do my best to minimize but still have to address.

So when we have our students, what do you believe is the best way to spend this time? I believe it’s the student-to-student, student-to-teacher, and student-with-self experiences that are the priority. Digital tools have a place, but it should not be the focus. If technology is the form, then pedagogy is the function. We need to ask ourselves why we want to use technology with a learning initiative, instead of what the technology is or how it can be used. This post is not to put down the role of technology in education, but to offer a different perspective – my own, as a frequent observer of teaching and learning in my role as an elementary principal.

When Technology Is Necessary

We implemented mobile technology into our school when a dozen teachers agreed to incorporate one iPad into their classroom as a pilot. They attended a number of after school trainings and shared what was going well and what wasn’t. This worked for us. It was context-specific and on a timeline people were comfortable with, myself included. There was no pressure to “upgrade” our instruction. Just try it and apply it.

This technology proved itself to be necessary as the year progressed. For example, primary teachers were recording student performance assessments, such as book talks and oral reports, using the iPad and then posting it online for parents to see. Intermediate students were introduced to digital word processing and blogging. They dove into high-interest literacy activities, such as collaborative story writing and providing feedback using what the web had to offer. We explored new ways to make literacy and learning go live.

Reports of these early successes spread. Even before this pilot was completed, other teachers were asking when they were going to get an iPad too. Fastforward to today: Each classroom has 5-6 tablets at the K-3 level. There is an iPad cart and a Chromebook cart available for our 4th and 5th grade classrooms. Just today, a 4th grade teacher was telling me how her students were going to culminate their personal narrative writing unit by creating a visual version of their stories using Explain Everything, and then posting them in FreshGrade, our digital portfolio tool, so families could see and hear their published work.

You may have noticed that we are not a one device to one student school. I am not sure we ever will be. This stated fact is not to suggest that this set up is not effective in other contexts. Not to repeat myself, but it’s what works for us. Our students get enough screen time at home. We are a Title I school, with two of our every three students living in poverty. Plus, kids come to school to be with their friends. Plugging them in may only serve to create distance between their important relationships. This leads into my own experience as a classroom observer who tried to maximize technology in my own practice without giving much thought to the pedagogy.

When Technology is Nice

I have been conducting instructional walks for a number of years now. These short and informal observations serve to provide feedback and affirmation for teachers and their current instruction.  In the past, I would bring in my iPad and a stylus, open up a note taking app such as Notability or Noteshelf, write what I observed on the tablet, and then save my notes in Evernote. As I left the classroom I would also email the teacher a copy of my digital notes.

After many conversations with teachers and taking time to reflect on the process, I realized that the technology cart was leading the instructional horse. Form was not following function. For instance, my time maneuvering the iPad and applications caused me to be distracted during the instructional walks. It distracted the students, too. Also, I wasn’t providing a tangible artifact for the teacher after a visit. Yes, they could print out my observational notes from what I shared with them via email. But that was one more step they had to take in an already busy schedule.

So I have dialed down technology during my instructional walks this year. I replaced my tablet and stylus with a notebook and pen. Technology did not totally disappear: I still use my smartphone to scan in my observational notes into Evernote. I’ve also explored using a Livescribe pen and companion smartphone app. While I write, the pen “talks” to the application via Bluetooth and transcribes what I write into a digital file. Both seem to work well. At this time, I’ve completed 50 instructional walks in classrooms. Last year, when my instructional walks were completed with an iPad, I did a total of 75.

Again, I don’t want to blame technology for my experiences. In different circumstances, a stylus and note taking app might serve a user really well. What mattered for me is the purpose of my visits: To observe daily instruction and serve as a collaborator and colleague with our teachers in this process. Technology was getting in the way, so I got it out of the way.

Schools have arrived at a point where access to online/digital learning is no longer the main issue. Instead, how access is thoughtfully and smartly utilized by educators will make the difference in students’ learning lives going forward.


This is a sponsored blog post. Thank you to Omninox for supporting this site. Omninox aims to “reduce teachers’ grading time and assignment creation time by up to 85%”. Click on the image below to visit their website, or click here to contribute to their Kickstarter campaign.

Screen Shot 2015-10-21 at 8.06.11 PM

Excellent iPad Apps for Demonstrating Learning for Students

Screen Shot 2015-10-17 at 9.22.53 PM

Reflector is software our school purchased a couple years ago for every teacher’s work station. Reflector allows the user to mirror the iPad screen to a computer, which can then be projected onto the smartboard. Anything happening on the iPad, including animation and sound, is played on the computer screen as well. Now untethered from the computer, the teacher is free to place himself or herself strategically in the classroom.

Here are three recommended apps that would work well for using the iPad for modeling and shared demonstration:

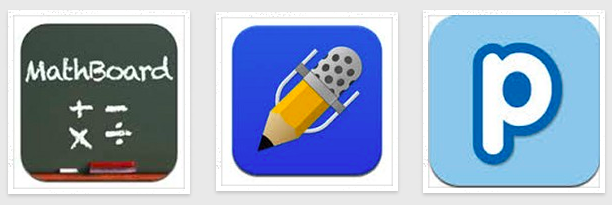
1. Math Board ($5): Teach students how to work problems for the four basic operations.

From the App Store description:

“More than just standard drills, MathBoard encourages students to actually solve problems, and not just guess at answers. This is done by providing multiple answer styles, as well as a scratchboard area where problems can be worked out by hand. Students can also turn to MathBoard’s Problem Solver for further help. This powerful teaching feature walks students through the steps required to solve addition, subtraction, multiplication, and division equations.”

There is also Math Board Fractions and Math Board Challenge, a head-to-head game where two students compete to see who can complete the problems faster.

2. Notability ($6): This handwriting and drawing tool is considered an “Essential” by Apple. Using a stylus, a teacher can model how to closely read text on a PDF or screenshot, demonstrate with students a genre of writing, and show students how to organize data for a science activity. Pictures and audio recording of your explanations can be embedded into the document. Hand off the iPad to another students when they are ready to share their own work.

3. Popplet ($5): This app allows you to create idea webs, especially helpful when brainstorming ideas for writing or for pre-assessing background knowledge on a topic.

From the App Store Description:

“Popplet is the simplest tool to capture and organize your ideas. With Popplet you can quick jot down your ideas and sort them visually. Popplet is great for school and for learning in the classroom and at home. Students use Popplet to think and learn visually. By capturing facts, thoughts, and images, students learn to create relationships between them and generate new ideas. ”

Which app(s) do you find useful for modeling and demonstrating with students on the iPad? Please share in the comments.

Examples of Practice: Using the iPad to Model Writing

In a recent post, I wrote about using everybody books to teach content. The example I provided focused on hurricanes, a timely topic right now. I ended the post by suggesting the classroom could use their new knowledge and summarize their learning through writing.

Since then, my very efficient technology specialist installed the Reflection app on all of our classroom workstations that are connected to the SmartBoards. This allows the teachers to mirror what is on their iPad to the screen. Excited, I decided to try out this new technology and model how to use it for the students and the teacher.

Model It

After finishing reading aloud a book on hurricanes, I wirelessly connected my iPad to the computer through Reflection and opened up Notability. With this app, I was able to use a stylus and write important information they suggested about hurricanes. Then the students asked more questions they had about hurricanes. We highlighted which questions we thought we could answer with another print resource.

Here is what we developed today.

So how does using the iPad augment this activity?

I can face the kids while teaching. I don’t have to go between the paper and the students. This would be true even if I was writing under a document camera. In fact, I could have sat with the students on the floor while writing, maybe even allowing them to do some of the writing and make it interactive. I believe combining the technology with my proximity to the students enhanced my instruction when compared to writing on chart paper or the board.

I am also finding that just using the technology while teaching increases the engagement level of the students. It’s not the novelty of the device either; this teacher has had an iPad in her classroom for almost a year. For instance, as I wrote today, the second grade students were very quick to tell me when my writing defaulted to my native cursive. I have had similar experiences when reading aloud a book that is digitally projected on the SmartBoard. Why they clue in a bit more when technology is part of the instruction is a question I am still trying to answer.

Celebrate It

After we were done, I emailed a copy of our writing to the teacher. She can print it off and post it in the room, or make several copies and put the writing in their book boxes to reread later. I have noticed students really enjoy reading text they created themselves or as a group.

I also want to recognize the teacher for being a learner along with me. One way I do this is sharing what they are doing in their classrooms in my Friday Focus, a weekly staff newsletter initially developed by Todd Whitaker.  For example, tomorrow I will describe the second quarter writing goals the second grade team is developing with their students to personalize their learning…

…and tie in how we took our instruction to the next level with the help of technology.

Second grade team is working with their students to set personal writing goals. This can help them become more self-directed learners. I even got involved in their studies, by using the iPad and the Reflection app to model writing.

Instructional Walkthrough Template v. 2.0

In a previous post, I shared an instructional walkthrough form for my school. It is based on three different forms and an instructional framework, the Optimal Learning Model. This tool allows for the collection of both numerical and narrative information.

When I presented this form to my Instructional Leadership Team, they had a few suggestions to alter it. For one, they wanted to be able to write comments on the bottom after the walkthrough, not just me. We changed this section to “Reflections” and clarified that this space is now usable for both the teacher and the observer. Related, they wanted to expand this area and create more space to respond to the observations.

With the walkthrough form ready to roll, there was nothing left to do but try it. Five staff members agreed to be guinea pigs and allow me to observe their classrooms. Using Notability on the iPad along with a stylus, I started visiting classrooms ten minutes at a time.

I started by noting where I saw the learning occurring and quickly made tallies.

At the same time, I wrote observations and posted questions in the narrative space, such as:

The students worked quietly on the task at hand.

How did this activity promote this level of engagement?

As I wrote, I would notice a theme in my observations and highlight it on the left side.

Once I had completed my observation (no more than ten minutes), I politely interrupted class and let everyone know what impressed me about their learning. This experience could be nerve racking, especially in the beginning. I wanted to be sure that my visit was viewed positively.

After I emailed my completed form to the teacher through Notability, I entered the tally mark totals into a Google Form in my office. The spreadsheet is set up to automatically tabulate what percentage of instruction is either shared, guided or independent as a whole building (this data is anonymous).

To finish up, I wrote my own comments about what I saw in class in the Reflection box. This was more summative in nature, based on the evidence I had just collected. If the pilot teachers wanted to see my comments, I encouraged them to stop by and chat. I am hesitant to provide my summary, at least initially, because it can shut down the thinking of the teacher. I am making a judgment about their instruction instead of allowing them to arrive at it through professional reflection. This process is not intended to be an evaluation.

The next step is to collaborate with the teachers I am trying this with and continue to tweak the form as needed. It may involve completing a walkthrough as a group while watching a teacher’s lesson on video.

Overall, I am happy with the progress we have made in assessing whether our instructional framework is truly embedded in our classrooms. I know we will continue to make changes, which is part of the growth process for all of us.

Recommended iPad Apps for Administrators

My team of elementary principals has agreed to purchase iPads. If we expect teachers to use technology with the purpose of improving pedagogy and learning, we need to model it. The fact that I discovered through Twitter that there is an iPad 4 only emphasizes our need to be connected learners. Without this knowledge, iPad 3s would be getting shipped to us as I write.

One of the first steps we are taking is deciding what apps to have preloaded on our devices. Here are a few that I am recommending to my technology director, Phil Bickelhaupt (@WRtechdirector). Many of these may be familiar to you, and I suppose there is a reason for that.

Free

  • Evernote – Excellent way to record and document gatherings (not “meetings”). Just this week, I held an impromptu staff gathering about some decisions made in our leadership team. Because of the short notice, not everyone could make it. I used Evernote to write down notes and record our conversation. Afterwards, I emailed the combined content to the rest of the staff. I am aware of at least two teachers who did listen to the audio while reviewing the notes.
  • Skitch – This app allows me to annotate over any photo or screenshot. I can then email that photo to a colleague, save it on my Camera Roll, export it to Evernote (this app is part of the Evernote Trunk), or create a public link as a final product. In the past, I have mostly used Skitch to email annotated photos of students to staff, but it seems like there is much potential with this tool.
  • Chrome – I had this app a while ago and didn’t like it. As people are want to say, Google doesn’t play with Apple. Since then, Chrome must have been improved. I can now check my school email account, modify my Google Site, work on Docs and use it as the browser that it is.
  • Dropbox – While Google Drive is nice for storing many kinds of documents, Dropbox does the rest. If I have photos or video I took in a classroom on my iPad, I can use this storage application to directly upload this content to my account. Once I have downloaded Dropbox to my computer and my phone, I can view these items wherever and whenever I want. Other perks include sharing folders with colleagues as well the iWorks Suite (Pages, Numbers, Keynote – all essential apps as well) now allowing uploading of files to Dropbox.
  • Flipboard – There is so much information out there. It is hard to wade through everything online without some type of reader app that delivers your favorite educational information to you. Flipboard subscribes to blogs and online news providers and puts the content into a magazine-style format. Content that you like can easily be shared via Twitter and email, or saved to read later. Zite is a similar reader app that is popular with educators.

Paid

  • GoodReader – This tool has been described as the Swiss Army Knife of apps and for good reason. As a principal, I have many files and documents I need to read, but I don’t always have time to do it. With GoodReader, I can save and organize this information into folders. I can also retrieve files from Dropbox or Google Drive by linking these accounts to the app. One of the best parts of GoodReader is being able to annotate and highlight a PDF, then save it and email it to a colleague later.
  • Notability – If the interface of GoodReader is a bit too busy, check out this app. It has a much cleaner look and is somewhat easier to organize files. Although I cannot connect with Google Drive, I can upload content from Dropbox. I use both apps for different purposes. While GoodReader is excellent for reading (hence the title), Notability is great for jotting notes with the handwriting tool. I can also import photos into the document as well as record audio. I think there is a lot of potential for using this tool with instructional walkthroughs. So why not use Notability instead of Evernote? Even though the former allows me to handwrite, the latter embeds the audio within my notes when sharing the content online.
  • Instapaper – When you think about it, the majority of our days are spent reading, much of it online. Viewing this much web content can be hard on the eyes. Instapaper is an app that allows me to bookmark text online and read it later in a plain, Kindle-like format.
  • Grafio – This app allows me to create diagrams and flow charts for my ideas and plans. It is very intuitive in that when I attempt to make certain shapes, it autocorrects the circle or square so it is perfect. Dragging a finger from one shape to another creates an instant arrow link. I have used this app to create a visual for my building’s professional development plan and to assign lunch supervisors to specific parts of the building.
  • iMovie – Creating videos using photos, video and audio is a cinch with this app. In my humble opinion, it is better than the Mac version because it is simpler. I can stretch out the audio or photo in the timeline by spreading the file out with two fingers. Uploading the finished movie to YouTube or Vimeo allows me to share the final product through a web link. I have used this app for recognizing student achievement and recording student book talks.

As an elementary principal, these apps are what I use the most. What are your favorites? Please share in the comments.

Writing Apps for Principals and Coaches

There are so many apps out there for different purposes when using the iPad. It is exciting and daunting at the same time. Specifically for writing about instruction observed in the classroom, a few apps at first glance seem to be great tools for providing feedback for staff and documenting evidence of learning.

Evernote (free)

What I like best about this tool is a) you can document what you observe audibly, visually and by typing, and b) this information can be accessed anywhere. What would this look like? Maybe you are doing instructional walkthroughs. A checklist of four main areas focusing on teacher and student language could be the template. After checking off what you see, language used by students and the teacher can be typed up to record more qualitative feedback. In addition, a photo of what you are seeing related to classroom dialogue could be taken with your iPad and added to the note. Once completed, the entire note can be emailed to the teacher or shared during a subsequent discussion. Simple instructions on how to create a checklist can be found here.

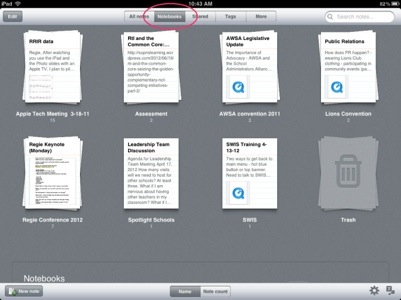
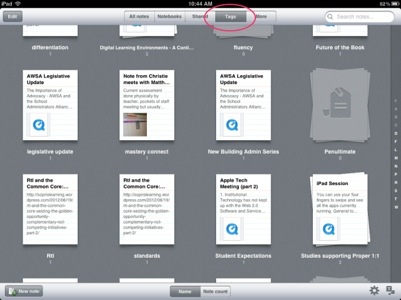
When you want to find a note, they are organized by notebooks or by tags for easy searching.

20120717-105424.jpg

20120717-105520.jpg

There are a few limitations I see with using Evernote for this purpose. First, I cannot find a way to easily export the checklist data to an Excel form. If you are looking for trends over time, it would be hard to use this data in Evernote’s format. Using Google Forms might be a better tool for this purpose. If there is a way to do this, my guess is either Bec Spink or Rob van Nood would have the answer.

Second, I wish there was a way to actually write using a stylus within Evernote, which leads into…

Penultimate ($0.99)

This app allows the user to write in notebooks using a finger or a stylus (I recommend a stylus such as Bamboo to avoid the smudges on the screen). You can write, sketch and erase plus add a picture in notebooks. Multiple notebooks can be created for individual classrooms. To share and read these notebooks, you can either email them out as a PDF or open them in another app such as GoodReader, iBooks or Kindle reader. More importantly, books or single pages can be sent to Evernote as their own note. What this means is you could combine your writing, text, audio and visuals all in one note on Evernote, albeit with a few preliminary steps. Check out this link on how to export Penultimate notebooks to Evernote using an iPad.

Notability ($0.99)

20120717-110512.jpg

If you want to keep things simple and be able to house audio, visuals, text and writing all in one file when documenting classroom activities, Notability is the way to go. What it has that Evernote doesn’t is the ability to sketch and write within the note as well as typing text, adding visuals and recording sound. Also, the layout and controls are more user-friendly than Evernote and Penultimate. Notebooks are color coded and the notes themselves seem to be easier to read.

20120717-111439.jpg

20120717-111533.jpg

What could be improved with Notability is the ability to share notes with others. Right now, you can upload notes to Dropbox, but the audio and the rest of the note end up as two separate files. In addition, to share a note with audio right from Notability via email is difficult because the memory size of the audio may be too large. Evernote is better in this area because you can share notes as a web link. It stays as one file.

Conclusions

If you are just starting out, like me, in documenting learning experiences in the classroom, Notability may be the best choice. I know one school district in Wisconsin uses this app to document the amount of time ELL students are given to talk with peers about their understanding. However, if sharing notes is essential to the walkthrough and coaching process, Evernote + Penultimate would be the best tool. The ability to have access to these notes from anywhere is also key. In addition, Evernote just acquired Penultimate. If these two apps eventually meld into one, it might be the perfect tool for principals and coaches to write on the iPad.